さて、引き続きレイアウトの種類を見ていきましょう。
Card レイアウト
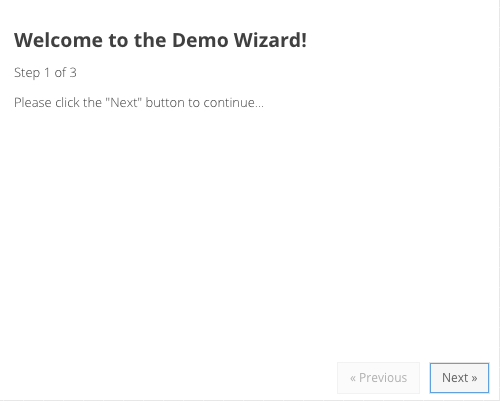
このレイアウトは、複数のコンテナー中、1つだけ全体表示(コンテナー内)で表示してくれるレイアウトです。プログラマブルに、アイテムを切り替えることができ、サンプルのようにウィザード形式のUIを構築したりすることができます。
カードになるコンテナーに対してidを設定することで、イベントハンドラなどでカードの表示を制御することができます。
|
1 2 3 4 5 6 7 8 9 10 11 12 13 14 15 16 17 18 19 20 21 22 23 24 25 26 27 28 29 30 31 32 33 34 35 36 37 38 39 40 41 42 43 44 45 46 47 48 49 50 51 52 53 54 55 |
items: [{ id: 'card-0', html: '<h2> Welcome to the Demo Wizard! </h2> <p> Step 1 of 3 </p> <p> Please click the "Next" button to continue... </p>' }, { id: 'card-1', html: ' <p> Step 2 of 3 </p> <p> Almost there. Please click the "Next" button to continue... </p>' }, { id: 'card-2', html: ' <h1> Congratulations! </h1> <p> Step 3 of 3 - Complete </p>' }] |
カードの表示制御は、setActiveItemで制御します。ドキュメントにあるように、getLayoutでレイアウトオブジェクトを取得してから、setActiveItemを呼び出すのがポイントです。
|
1 |
panel.getLayout().setActiveItem(1); |
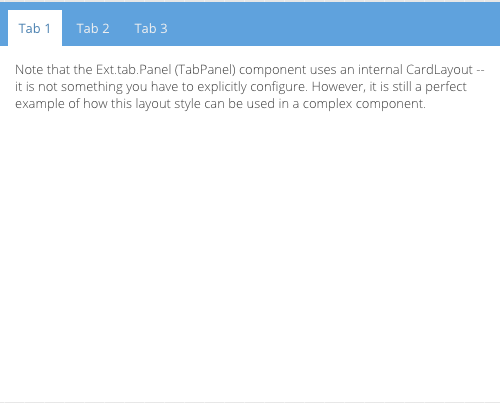
このレイアウト、実は、Ext.tab.Panelクラスで利用されていて、タブの内容切替は、このCardレイアウトが使われています。タブパネルを使うときに、Cardレイアウトを意識することは、あまりないかも知れませんが、タブを押す以外に、先ほどのようにプログラマブルにタブを切り替えることもできるわけですね。
Center レイアウト
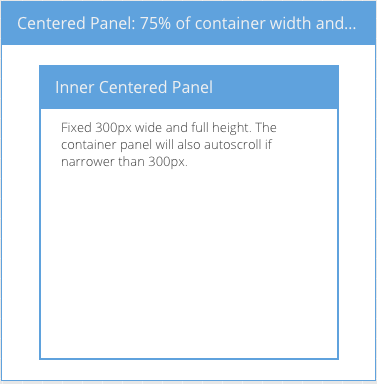
1つのコンポーネントを中央に配置するレイアウトが、このレイアウトになります。ログインフォーム作った頃に、vbox/hboxで作りましたが、実はこのcenterレイアウト一発でも作れるわけですね。
中央に配置する、下記の場合パネルですが、widthとheightにパーセント指定、またはピクセル指定をしてサイズを決めることができます。
|
1 2 3 4 5 6 7 8 9 10 11 12 13 14 15 16 17 18 19 |
items: { title: 'Centered Panel: 75% of container width and 95% height', border: true, layout: 'center', scrollable: true, width: '75%', height: '95%', bodyPadding: '20 0', items: [ { title: 'Inner Centered Panel', html: 'Fixed 300px wide and full height. The container panel will also autoscroll if narrower than 300px.', width: 300, height: '100%', frame: true, bodyPadding: '10 20' } ] } |
Column レイアウト
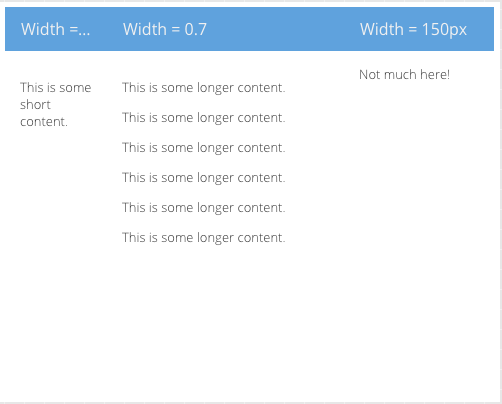
アイテムをカラム状に配置するのが、このレイアウトです。
カラムの幅を、パーセント指定したい場合は、columnWidthを使います。1が100%を指しますので、小数点で指定します。また、widthでピクセル指定したものを混ぜることも可能です。
|
1 2 3 4 5 6 7 8 9 10 11 12 13 14 15 16 17 18 19 20 21 22 23 24 25 26 27 28 29 30 31 32 33 34 35 36 37 38 39 40 41 42 43 44 45 46 47 48 49 50 51 52 53 54 55 56 57 58 59 60 61 62 |
items: [ { title: 'Width = 0.3', columnWidth: 0.3, html: '<p> This is some short content. </p>' }, { title: 'Width = 0.7', columnWidth: 0.7, html: ' <p> This is some longer content. </p> <p> This is some longer content. </p> <p> This is some longer content. </p> <p> This is some longer content. </p> <p> This is some longer content. </p> <p> This is some longer content. </p>' }, { title: 'Width = 150px', width: 150, html: 'Not much here!' } ] |
終わりに
レイアウトの種類、まだありますねぇ。もうちょっと続きます。レイアウトの種類を把握して、さらにタブパネルのように最初から組み込まれて使われているレイアウトについて把握しておくと、それぞれのコンポーネントを扱うときにも非常に有効です。
ここでは、紹介のみを行っていますが、実際に手元でレイアウトを使って動かしてみることをオススメします。

